Set Up Checklists
Checklists are available on accounts with the service checklist add-on plan. To see a demo or upgrade your account, email support@orangeqc.com.
How to Set Up a New Checklist
- Assign yourself the “Service Checklist User” role.
- Open the People tab and find yourself in the list of users.
- Click to open your profile.
-
Scroll down to the Roles section and check the “Checklist User” box.

- In the Permissions section, look for the "Checklists" portion. Check the "Can view checklists" box.
- If you will be tying checklist completion in with visit tracking, continue to the "Visits" portion. Check the "Can view visits" and "Track visits when scanning QR codes" boxes.
- Scroll to the bottom of the page and click “Save.”

- Create a checklist.
- Go to the Setup tab, then click Checklists in the left-hand sidebar. (You can also start with a template from the Template Library instead.)
- Click “+ New Checklist” in the upper right-hand corner.
- Give your checklist a name and add instructions you'd like to appear at the top, if any.
- Create the line items for the checklist.
- (Optional) Just as with inspection line items, you can click the gray plus sign on the right-hand side of each line item to add a description. This is useful for any notes the team needs, or for adding translations.
- (Optional) Add sections if you'd like certain line items to be grouped together. You can mix sections with individual line items outside those sections.
- Click “Save” at the bottom of the page.
- Assign the checklist to the right areas.
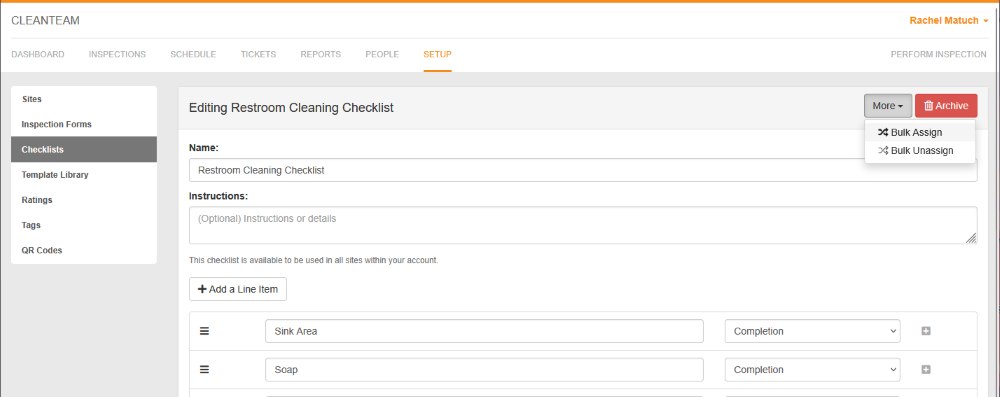
- With the checklist still open, click “More” in the upper right-hand corner.
-
Select “Bulk Assign” from the drop-down menu.
- Use the site and area list to choose where you want the checklist to be available. You can choose whether you want the inspection available in the lowest-level folder within selected areas, or if you want the checklist to only be assigned to the areas actually selected.
- Click “Review Assignment.”
- Read through which areas the checklist will be assigned to, then click “Approve and Proceed.”

How to Complete a Checklist on the App
- Open the Inspections tab and navigate to the right area.
- You will see a new section for Checklists, which lists all checklist forms available at that area. (If you don’t see the checklist, pull to refresh.)
- Tap the checklist you want to complete.
- Complete the checklist.
- Check off each line item as you complete it.
- Tap the three-dot icon to the right of each line item to take a photo, choose a photo from your device's saved photos, or add a comment.
- Submit.
- Tap “Submit” at the bottom of the checklist.
- If you go to the Account tab and tap “My Checklists” under Content, you will see the submitted checklist.
View Submitted Checklists on the Web App
Your new Checklists tab in the web app works much like the Inspections tab.
Click “View” on the right-hand side to open up an individual checklist report. Beneath each line item, you’ll see whether or not the item was checked off.
Checklists performed during a visit (as part of Visit Tracking) will now be listed under visit tracking reporting, too.